Table of Contents
Imagine having a delicious, nutritious snack ready in just minutes that satisfies your sweet tooth without any guilt. That’s exactly what this healthy energy balls recipe delivers! These bite-sized treats are creamy, perfectly sweet, and packed with wholesome ingredients that provide lasting energy throughout your day. The best part? No baking required! Just mix, roll, and enjoy.
I first discovered energy balls when searching for portable snacks to fuel my busy days. What started as a simple experiment has turned into my go-to recipe that friends and family constantly request. What makes this healthy energy balls recipe special is its incredible versatility – you can customize the flavors while maintaining the perfect chewy texture that makes them so satisfying.
Whether you’re looking for a quick breakfast on-the-go, a post-workout refuel, or a healthier alternative to cookies, these almond butter energy balls have you covered. They’re ready in under 15 minutes and stay fresh for days, making them perfect for meal prep. Even my picky kids love them, which speaks volumes about how delicious they truly are!
If you enjoyed our Gluten-Free Hummus Recipe, you’ll absolutely love these energy balls. They share that same philosophy of simple, wholesome ingredients transformed into something irresistibly delicious. Ready to roll up your sleeves and create these delightful treats? Let’s get started!
What are Energy Balls?
Ever wonder why these little spheres of goodness have taken the healthy snacking world by storm? Well, energy balls (also known as protein balls, bliss balls, or power bites) are essentially the perfect portable snack wrapped up in a bite-sized package! But what’s in a name, right?
These little rounds of joy earned their moniker because they’re specifically designed to provide a quick energy boost when you need it most. Made primarily with nutrient-dense ingredients like nut butters, dates, and various superfoods, they pack a powerful punch despite their small size. As the old saying goes, “the way to anyone’s heart is through their stomach,” and these little morsels certainly take a direct route!
The beauty of this healthy energy balls recipe lies in its simplicity and versatility. Unlike traditional baked goods that require precision and patience, these no-bake treats are forgiving and adaptable to whatever ingredients you have on hand. Why not roll up your sleeves and whip up a batch today? Your future hungry self will thank you!
Why You’ll Love This Healthy Energy Balls Recipe:
This healthy energy balls recipe is about to become your new favorite snack, and for good reason! First and foremost, these almond butter energy bites deliver incredible taste and texture in every bite. The combination of creamy nut butter, sweet dates, and crunchy add-ins creates a perfect balance that satisfies cravings while providing sustained energy. Each ball is like a miniature power pack designed to fuel your busy day.
Making these energy balls at home is incredibly cost-effective compared to store-bought versions. Have you seen the price of packaged energy balls lately? They can cost up to $3 each! With this recipe, you can make a batch of 20-24 energy balls for the price of just a few store-bought ones. Plus, you control exactly what goes into them, avoiding unnecessary preservatives and added sugars that commercial varieties often contain.
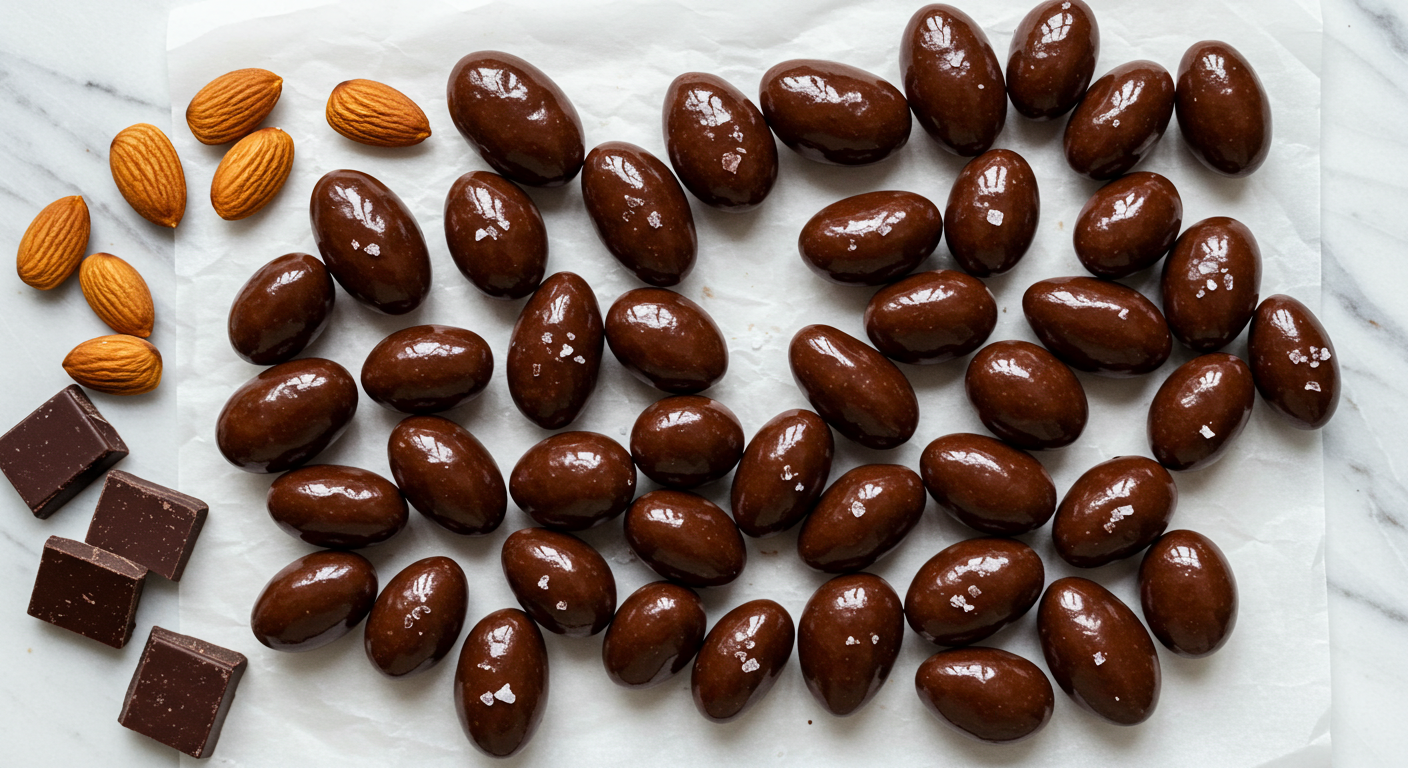
The versatility of toppings and mix-ins truly makes this recipe shine. From dark chocolate chips and coconut flakes to chia seeds and goji berries, you can transform the base recipe into countless delicious variations. Each ingredient not only adds unique flavor but also brings its own nutritional benefits. Our personal favorite combination is almond butter with dark chocolate and sea salt – the sweet-salty balance is absolutely divine!
If you enjoy these energy balls, you’ll definitely want to try our Greek Yogurt with Honey recipe next. Both make perfect healthy snacks that satisfy sweet cravings while providing actual nutrition. Why not give these energy balls a try today? They might just become your new go-to snack!
How to Make Healthy Energy Balls:
Quick Overview
Creating this healthy energy balls recipe couldn’t be easier! These no-bake treats come together in just minutes and require minimal equipment. The combination of almond butter and dates creates an irresistibly chewy texture with natural sweetness, while customizable mix-ins allow you to create your perfect flavor profile. From start to finish, you’ll spend about 15 minutes active preparation time, plus some chilling time for the best consistency.
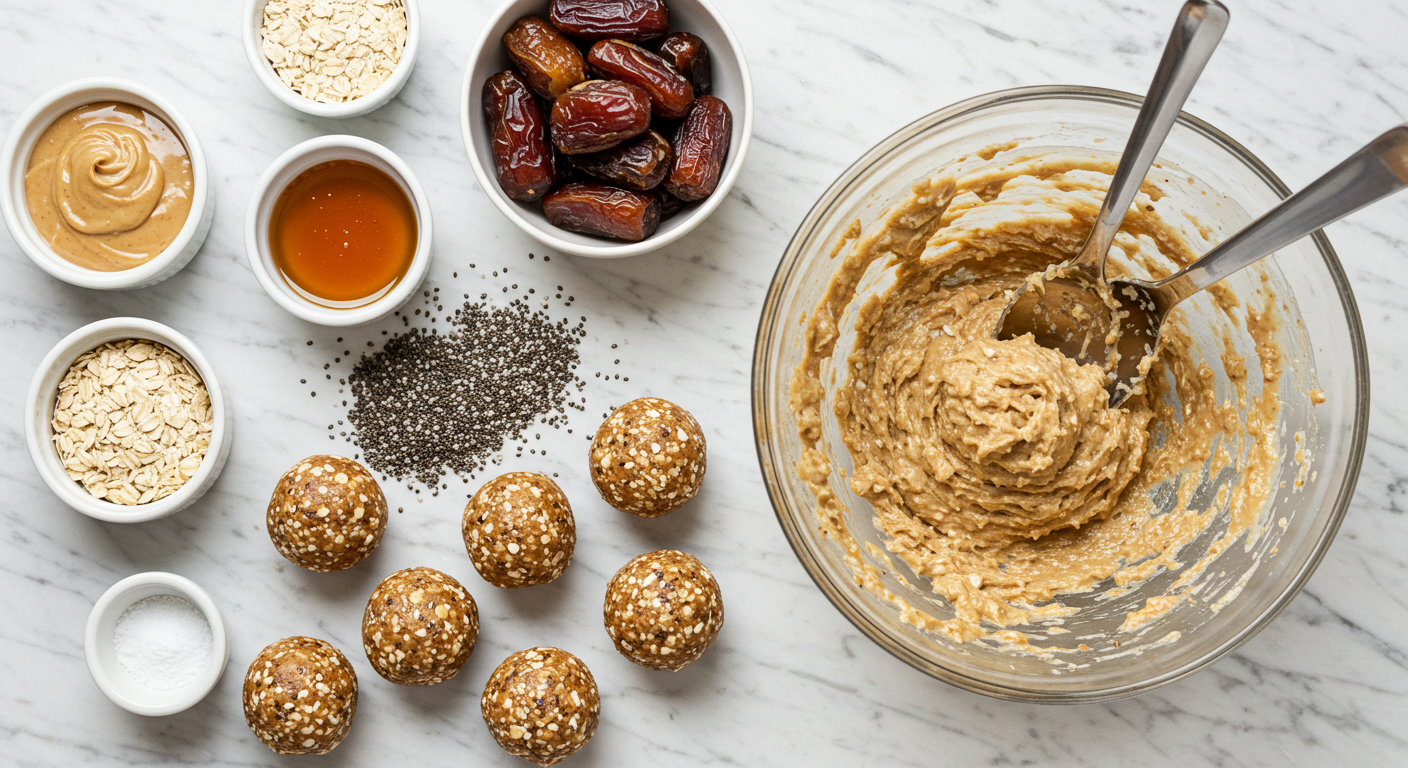
Key Ingredients for Healthy Energy Balls:
- 1 cup almond butter (or another nut butter of choice)
- 1 cup Medjool dates, pitted (about 10-12 dates)
- 2 cups rolled oats (use certified gluten-free if needed)
- ¼ cup honey or maple syrup
- 2 tablespoons chia seeds
- 1 teaspoon vanilla extract
- ½ teaspoon cinnamon
- ¼ teaspoon sea salt
- Optional mix-ins (choose based on your desired variation): mini chocolate chips, chopped nuts, coconut flakes, dried fruits, or protein powder
Step-by-Step Instructions:
- Prepare the dates: If your dates aren’t soft and fresh, soak them in warm water for 5-10 minutes, then drain thoroughly. This ensures they’ll blend smoothly with the other ingredients.
- Process the base: In a food processor, combine the dates and almond butter. Pulse until the dates are broken down and well incorporated with the nut butter, creating a sticky, uniform mixture.
- Add dry ingredients: Transfer the date-nut butter mixture to a large bowl. Add the rolled oats, chia seeds, vanilla extract, cinnamon, and salt. Mix thoroughly using a sturdy spoon or your hands until everything is well combined.
- Sweeten to taste: Add honey or maple syrup and mix again. The mixture should be sticky enough to hold together when pressed between your fingers.
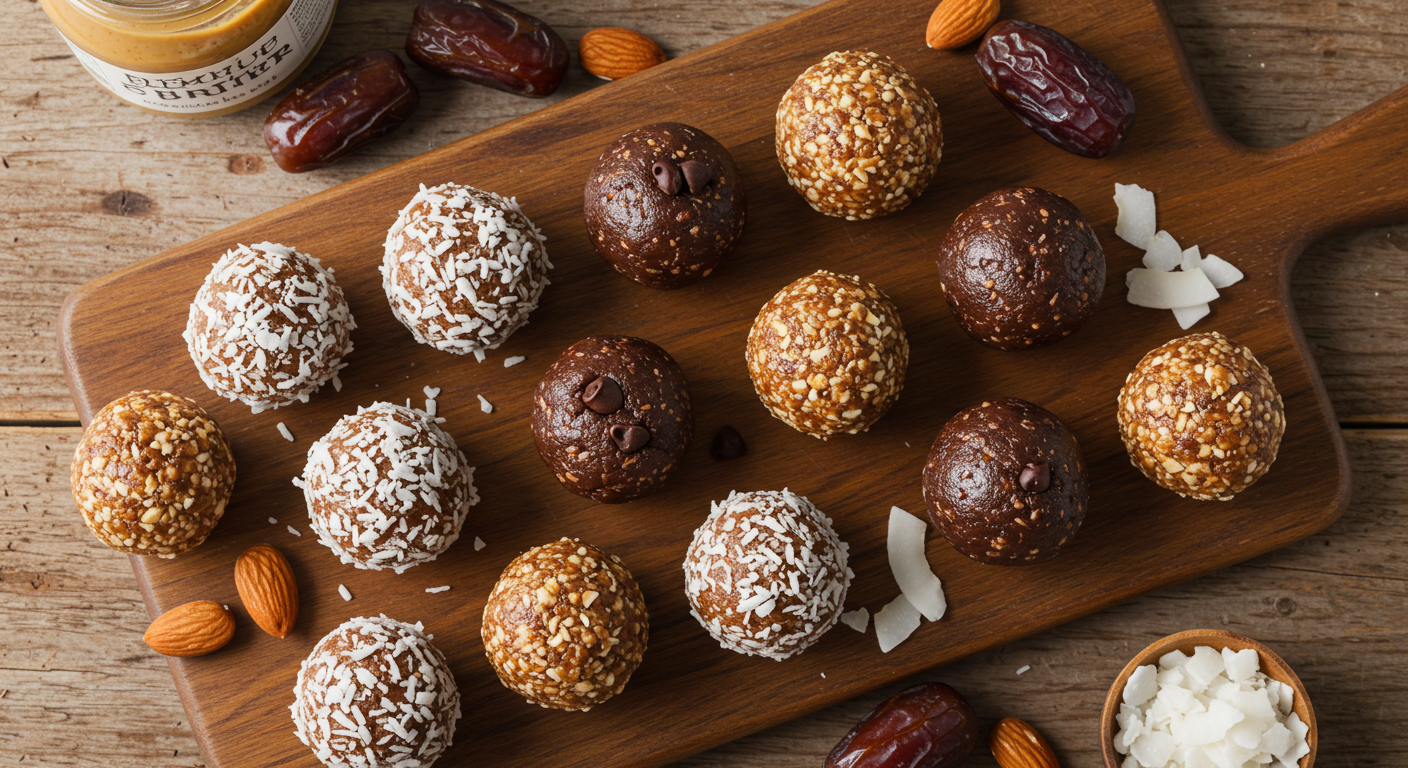
- Customize your flavor: This is where the magic happens! Fold in your chosen mix-ins to create different variations:
- For chocolate lovers: ¼ cup mini dark chocolate chips
- For tropical twist: ¼ cup coconut flakes and 2 tablespoons chopped dried mango
- For extra protein: 2 tablespoons protein powder and 2 tablespoons hemp seeds
- For antioxidant boost: 2 tablespoons dried goji berries and 2 tablespoons cacao nibs
- For nutty crunch: ¼ cup chopped almonds or walnuts
- For spiced version: Additional ½ teaspoon cinnamon and ¼ teaspoon nutmeg
- For citrus zing: 1 tablespoon orange zest and 2 tablespoons dried cranberries
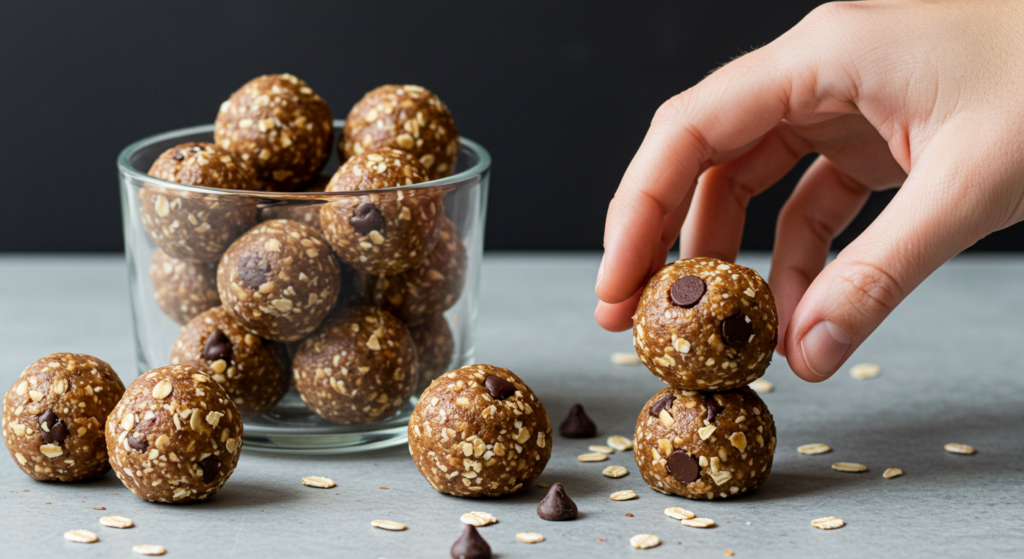
- Form the balls: Using slightly damp hands (to prevent sticking), scoop about 1 tablespoon of mixture and roll between your palms to form balls. Place them on a parchment-lined tray or plate.
- Chill to set: Refrigerate the energy balls for at least 30 minutes to firm up before enjoying. This helps them maintain their shape and improves the texture.
What to Serve Healthy Energy Balls With:
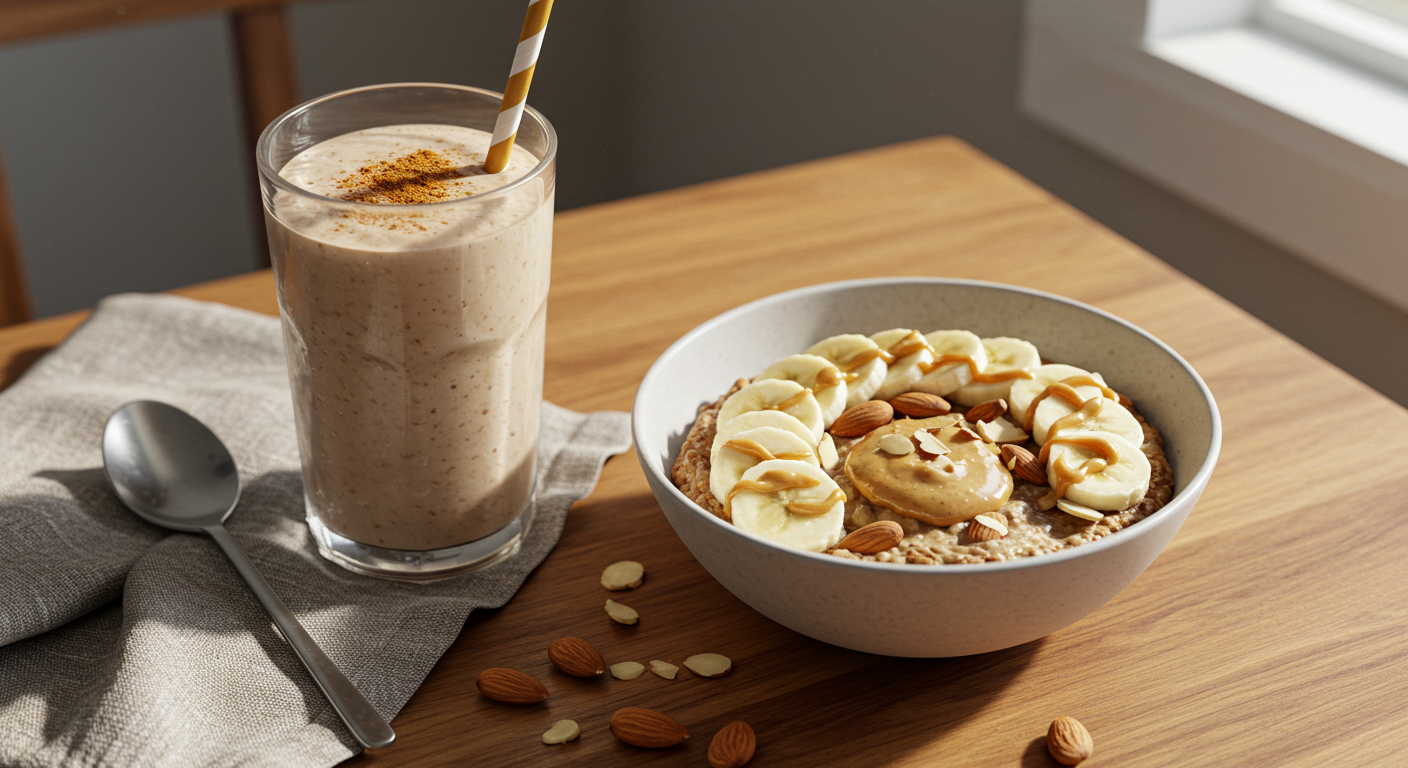
These versatile energy balls are perfect on their own, but they can also be part of a more substantial snack or light meal. For a complete breakfast on-the-go, pair a couple of energy balls with a piece of fresh fruit and a small container of Greek yogurt. The combination provides a good balance of protein, healthy fats, and carbohydrates to keep you satisfied until lunchtime.
For an elevated afternoon pick-me-up, serve energy balls alongside a warming cup of herbal tea or a frothy matcha latte. The combination is particularly comforting during colder months. In summer, these treats pair wonderfully with a cold brew coffee or a refreshing smoothie for the perfect cool-down snack after outdoor activities.
For entertaining, arrange energy balls on a dessert platter with fresh berries, small squares of dark chocolate, and perhaps some whipped coconut cream for dipping. This creates a healthier dessert option that still feels indulgent and special for guests.
Top Tips for Perfecting Healthy Energy Balls:
Achieving the perfect texture for your healthy energy balls requires a few insider secrets. First, the ratio of wet to dry ingredients is crucial – if your mixture is too dry and crumbly, add a bit more nut butter or honey one teaspoon at a time. Conversely, if it’s too wet and sticky to roll, gradually incorporate more oats or a tablespoon of coconut flour, which absorbs moisture beautifully.
For those with dietary restrictions, this recipe is highly adaptable. Need a nut-free version? Substitute sunflower seed butter for the almond butter and ensure your other ingredients are processed in nut-free facilities. Going vegan? Simply swap honey for maple syrup or agave nectar. The versatility extends to the oats as well – while rolled oats provide the best texture, you can use quick oats in a pinch (though you may need slightly less since they’re more absorbent).
One common mistake is not blending the dates sufficiently. They should be completely broken down and integrated with the nut butter to create a smooth, sticky base. If you don’t have a food processor, try chopping the dates very finely before mixing, or better yet, look for date paste at specialty stores.
Temperature plays a surprising role in both making and storing these balls. Working with slightly cool ingredients helps prevent stickiness while rolling. Additionally, if you’re adding chocolate chips to warm mixture, they may melt – which could be delicious, but changes the intended texture. For best results, let your mixture cool slightly before adding temperature-sensitive mix-ins.
Storing and Reheating Tips:
Proper storage is key to maintaining the freshness and texture of your homemade energy balls. For everyday enjoyment, store your energy balls in an airtight container in the refrigerator, where they’ll stay fresh for up to two weeks. Place parchment paper between layers to prevent sticking. At room temperature, they’ll last about 3-4 days, making them perfect for lunchboxes or day trips.
For longer-term storage, these energy balls freeze beautifully. Arrange them on a baking sheet in a single layer and freeze until solid (about 1-2 hours), then transfer to a freezer-safe container or ziplock bag. This pre-freezing prevents them from sticking together. Properly stored, frozen energy balls maintain their quality for up to 3 months.
When you’re ready to enjoy your frozen energy balls, you have options. For a quick snack, you can eat them straight from the freezer – they’ll have a deliciously firm, almost fudge-like texture. Alternatively, transfer your desired portion to the refrigerator and allow them to thaw overnight, or let them sit at room temperature for about 30 minutes before enjoying.
If your energy balls have been stored for a while and seem to have dried out slightly, try rolling them between your palms to warm them up, which reactivates the oils in the nut butter and improves their texture. For an extra refresher, you can also drizzle them with a tiny bit of honey or press them into additional toppings like coconut flakes or chopped nuts.
Conclusion: Enjoying Your Homemade Healthy Energy Balls Recipe
Creating your own healthy energy balls recipe at home opens up a world of nutritious snacking possibilities. These versatile, no-bake treats prove that eating well doesn’t have to be complicated or time-consuming. By taking just 15 minutes to prepare a batch, you’ll have delicious energy-boosting snacks ready for the entire week.
The beauty of these almond butter energy balls lies in their adaptability to your personal preferences and dietary needs. Whether you’re gluten-free, vegan, or simply looking to incorporate more wholesome foods into your diet, these energy balls can be customized to fit perfectly into your lifestyle. The seven variations we’ve shared are just the beginning – let your creativity run wild with different flavor combinations!
As you enjoy these nutrient-dense treats, remember that they’re not just delicious but also functional food, designed to provide sustained energy and satisfaction between meals. Their portable nature makes them perfect for busy days, workout fuel, or a quick breakfast on the go. So roll up a batch today and discover why these simple, no-bake treats have become a staple in health-conscious kitchens everywhere!
FAQ
What makes these energy balls a healthy snack option?
These energy balls are packed with nutritious ingredients like almond butter, dates, and oats. They provide a balanced mix of protein, healthy fats, and complex carbohydrates. They’re naturally sweetened and don’t contain any processed sugars or artificial ingredients.
Can I make these energy balls without a food processor?
Yes, though it’s a bit more challenging. You’ll need to chop the dates very finely and use a powerful blender or really strong arm muscles! Another option is to purchase date paste instead of whole dates to skip the processing step entirely.
How can I make these energy balls protein-rich?
To boost the protein content, add 2-3 tablespoons of your favorite protein powder to the base mixture. You can also incorporate hemp seeds, additional nut butter, or collagen peptides (if you’re not vegan).
Are these energy balls suitable for children’s lunchboxes?
Absolutely! These make great lunchbox treats. For school settings with nut restrictions, try using sunflower seed butter instead of almond butter. You might also want to make them smaller for little hands and appetites.
How do I prevent the mixture from sticking to my hands when rolling?
The best trick is to slightly dampen your hands with cold water before rolling. You can also refrigerate the mixture for 15-20 minutes before rolling to make it less sticky and easier to handle.
Can I make these energy balls without oats?
Yes! For an oat-free version, you can substitute the same amount of coconut flakes, or a mixture of ground flaxseed, almond flour, and additional nuts or seeds. The texture will be different but equally delicious.
Is Guacamole Gluten Free? 7 Easy Dairy-Free Recipes
Gluten-Free Hummus Recipe: 4 Best Ways to Serve